Sizing Beams
Last updated October 11, 2024
By Emma Howland
Open a floor framing plan and ForteWEB
- Start with adding a floor level to the project in Forte- typically exposure B, add mean roof height (Taken at the midpoint of a gable)
- Add a member to the level, label beam “BM-01” following typical format
- select the type of beam:
- Floor: joists, drop beam, flush beam
- Roof: joists, drop beam, flush beam, hip/valley beam
- Wall: Header, stud, column
- Free standing post
- select the type of beam:
- Spans & Supports tab
Ex: 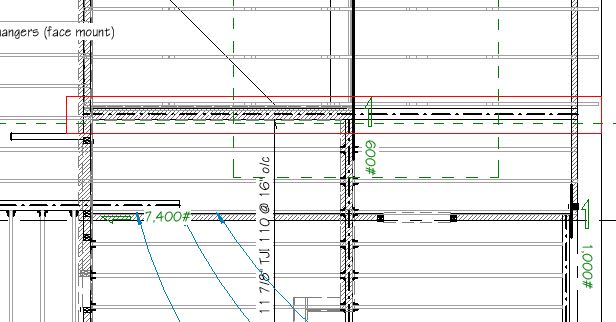
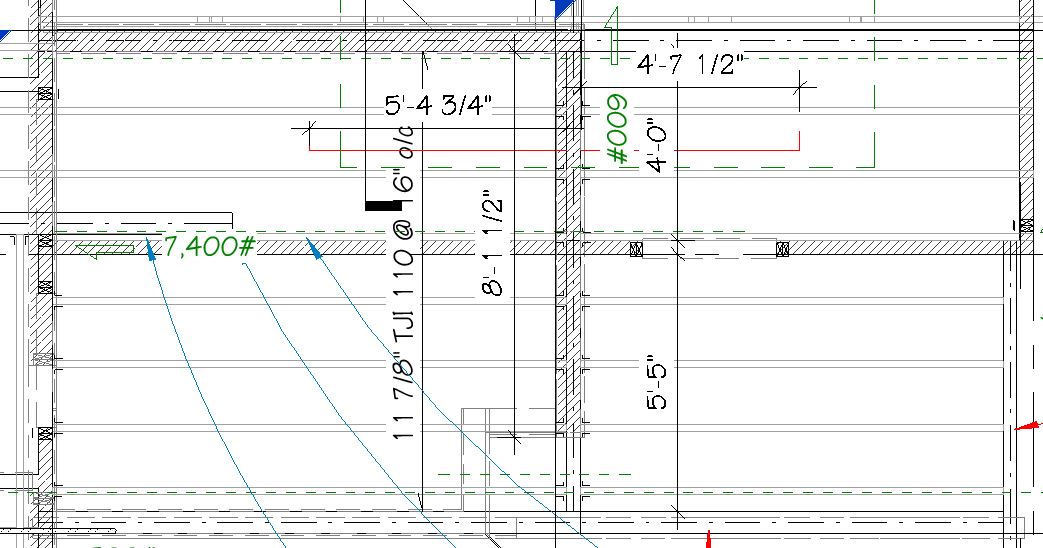
Beam over garage, supporting North wall of closet on second story (BM-11)
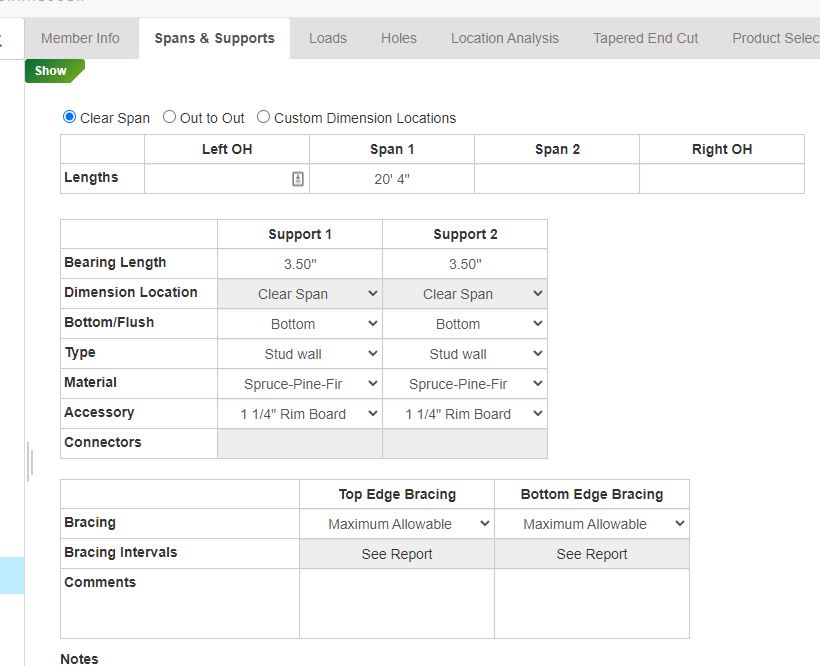
- Spans & Supports:
- Span 1: note: this beam is running parallel to the garage roof joists and upper story floor joists

-
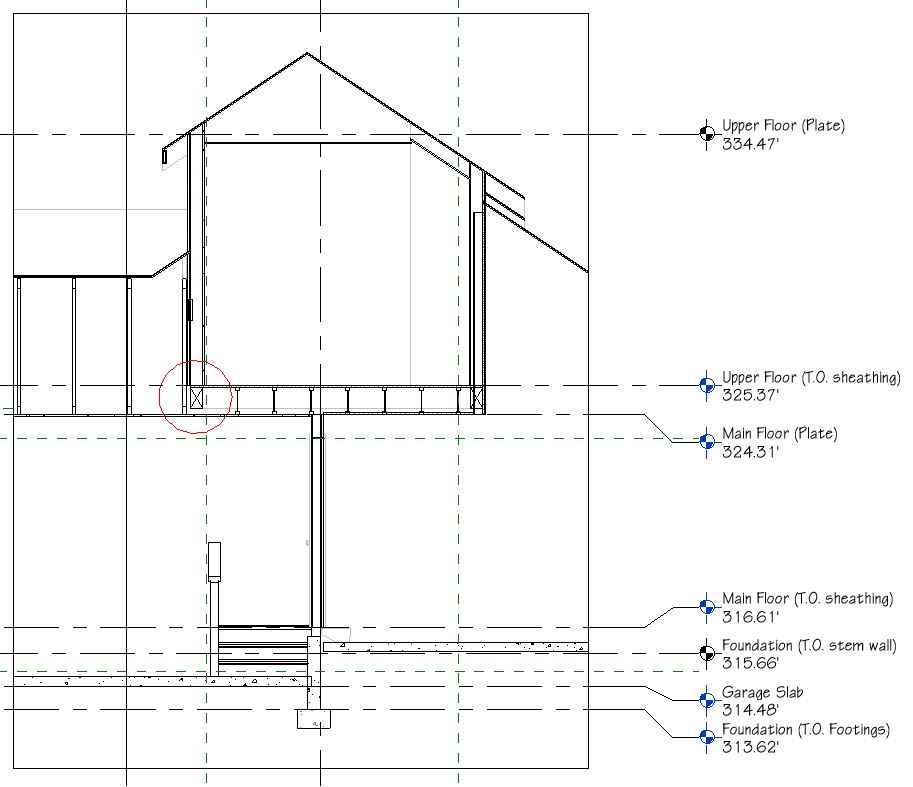
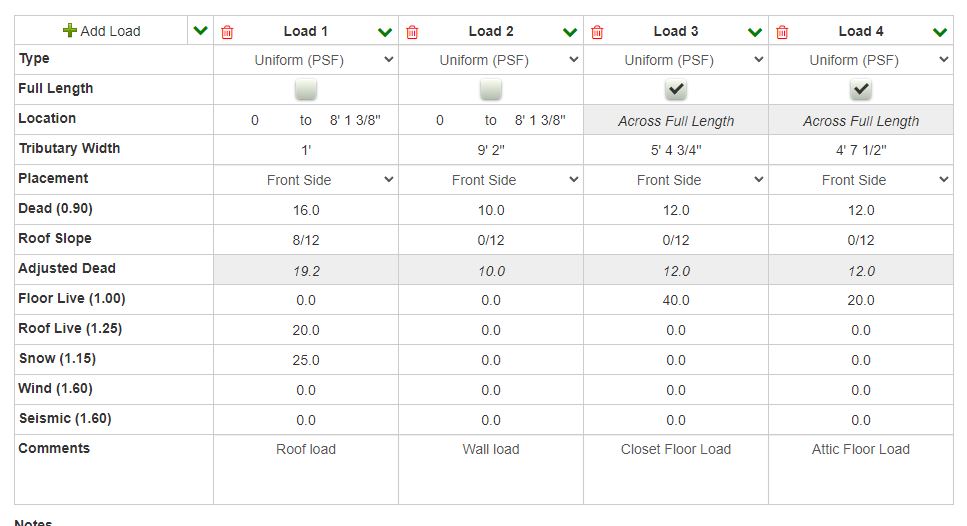
- Loads: Trace the loads that are acting on this beam from the top down. Cut a section and cross section through the beam to get a visual diagram to work through the load tracing.
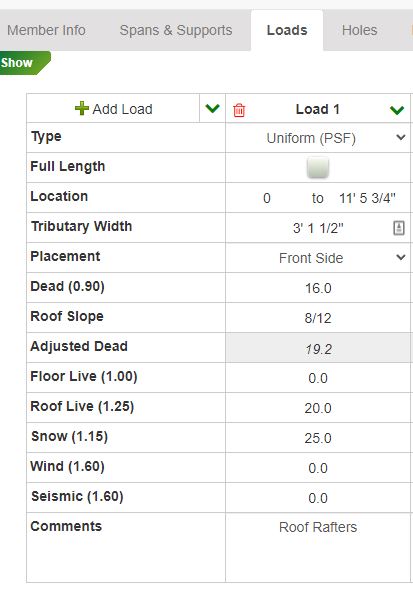
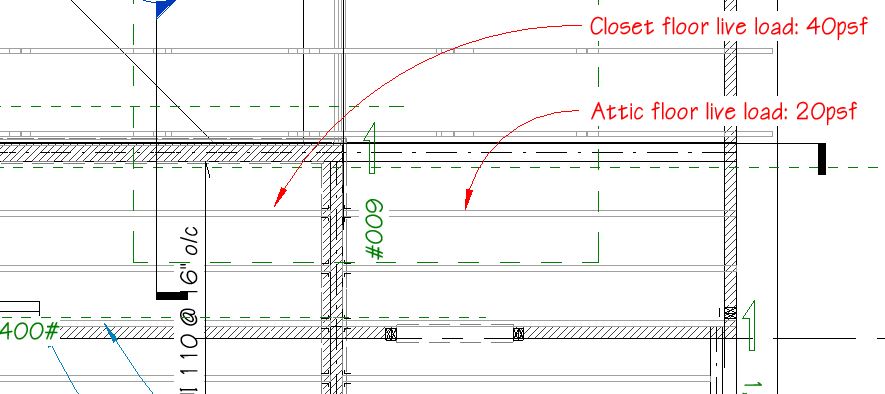
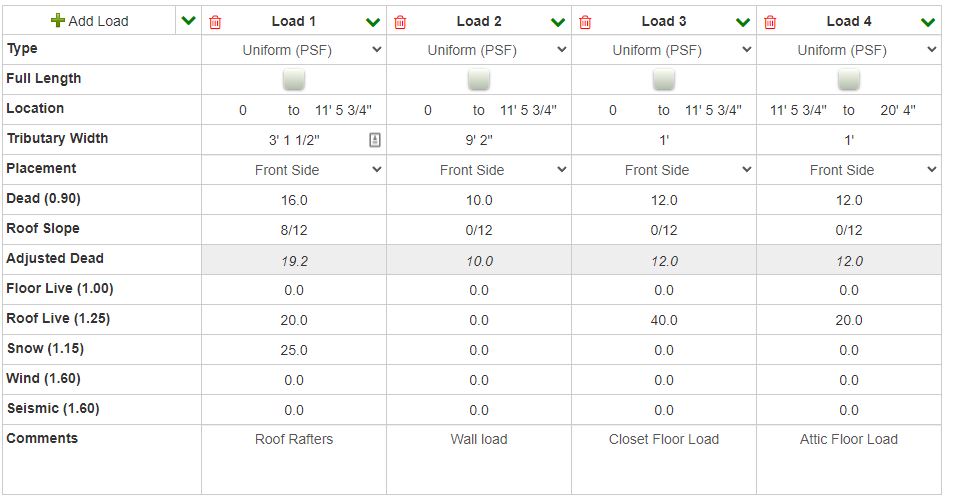
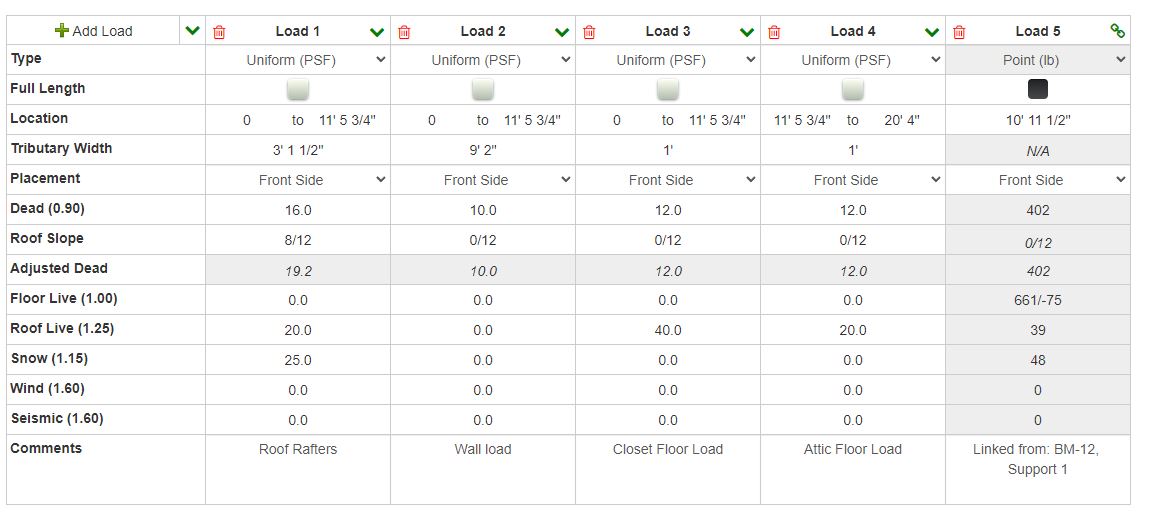
- The roof rafters are perpendicular to the floor beam. The roof rafters are also only on part of the beam (11’5 3/4″ from the West 0 point)
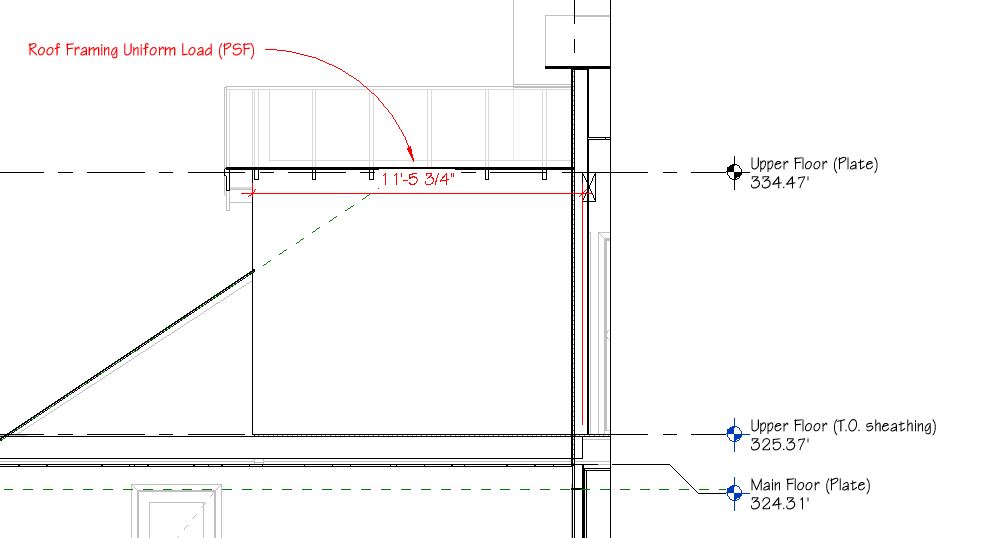
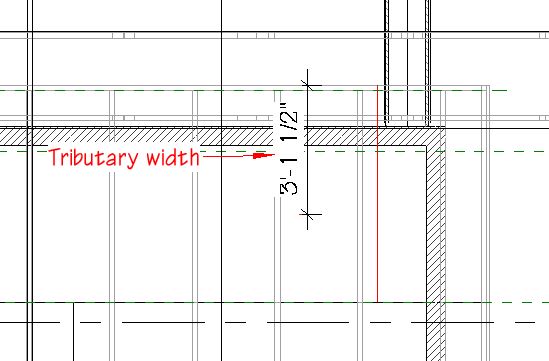
- Note: The Roof Live Load is only used for incidental roof loads (ex. maintenance work) and is always 20 psf. When the roof is design to be occupied (like a roof deck) the is considered a “Live Load” instead
- Note: The Roof Live Load is only used for incidental roof loads (ex. maintenance work) and is always 20 psf. When the roof is design to be occupied (like a roof deck) the is considered a “Live Load” instead
- Tracing down, there is a wall that is sitting directly on top of the beam (Uniform PSF). The tributary width is equal to the height of the wall. The dead load can be found in the structural calcs intro
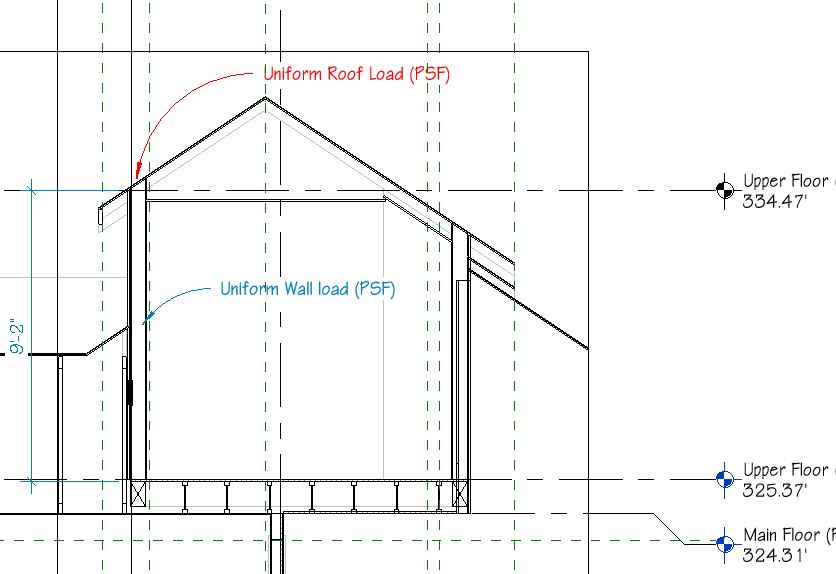
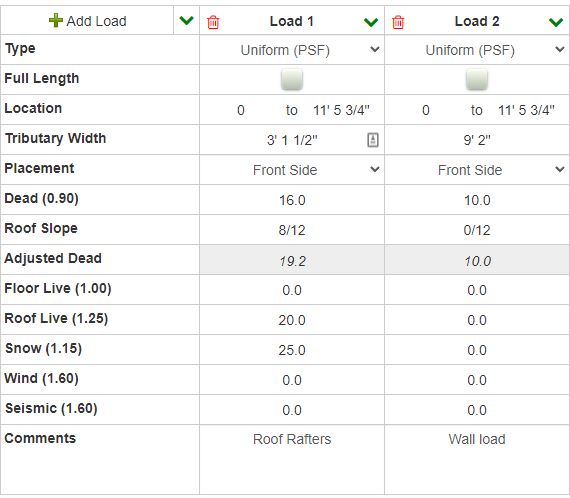
- Next is the floor load- the floor and attic joists are running parallel to the beam so the tributary width is only 1′
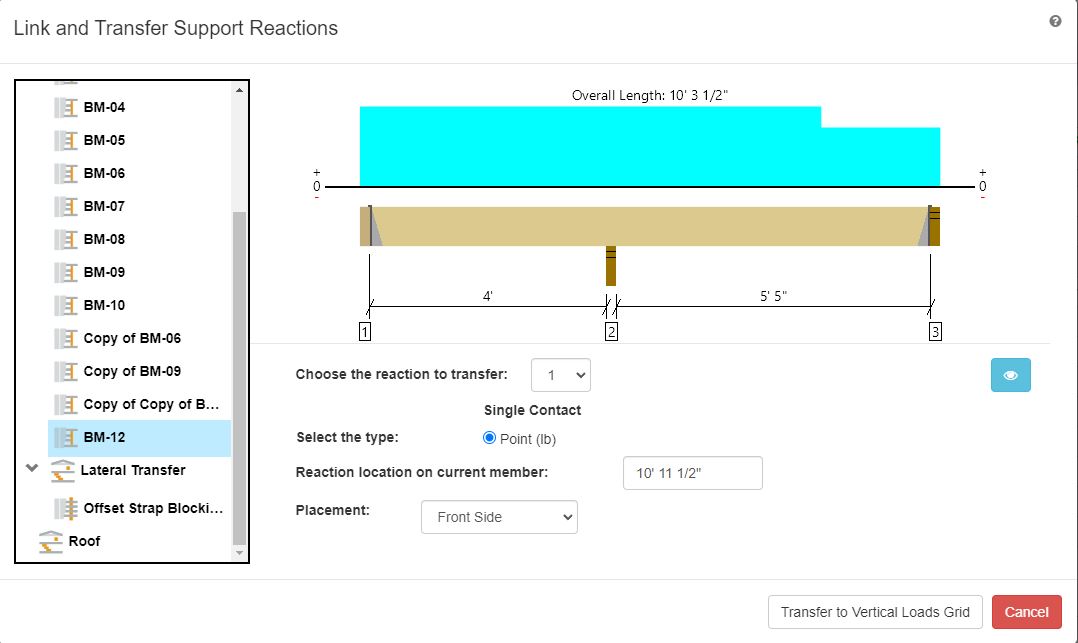
- Last- beam 12 intersects beam 11. This will require creating an entry for beam 12 first so that the loads can be linked back to beam 11.
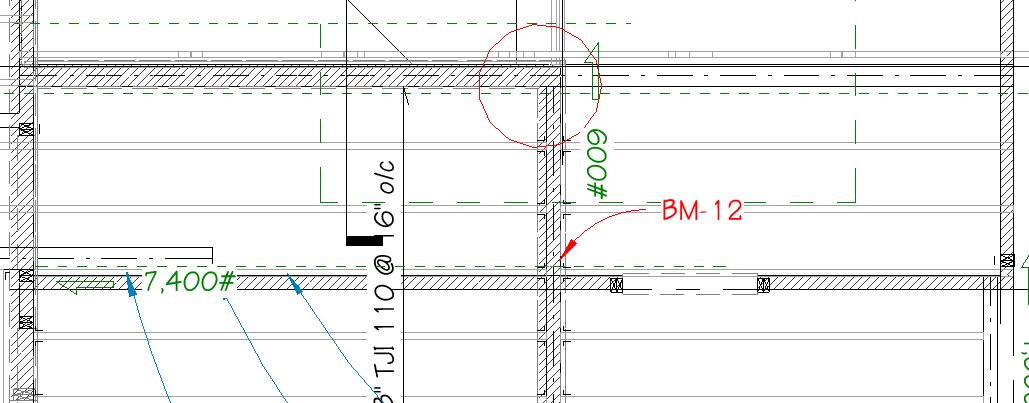
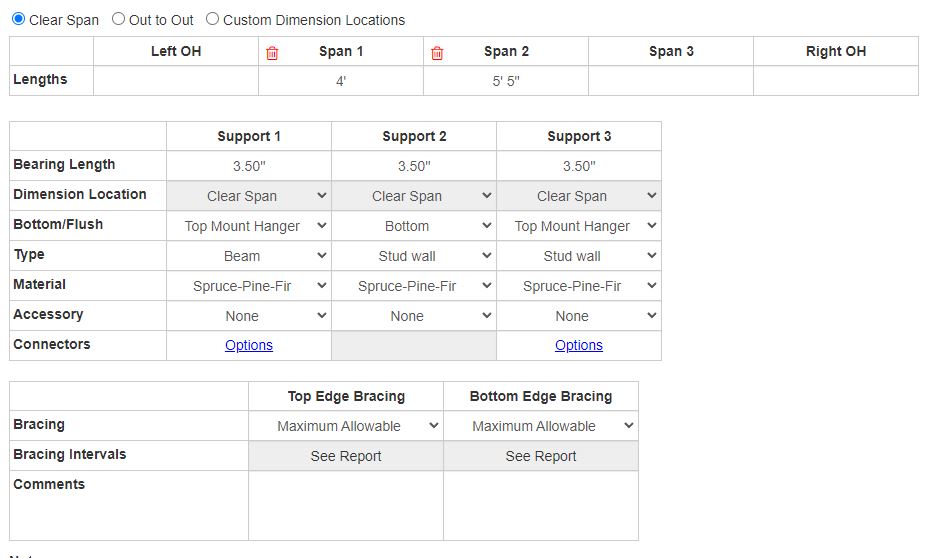
- Beam 12 has two spans because a wall runs underneath of it. The first span is 4′, the second span is 5’5″.
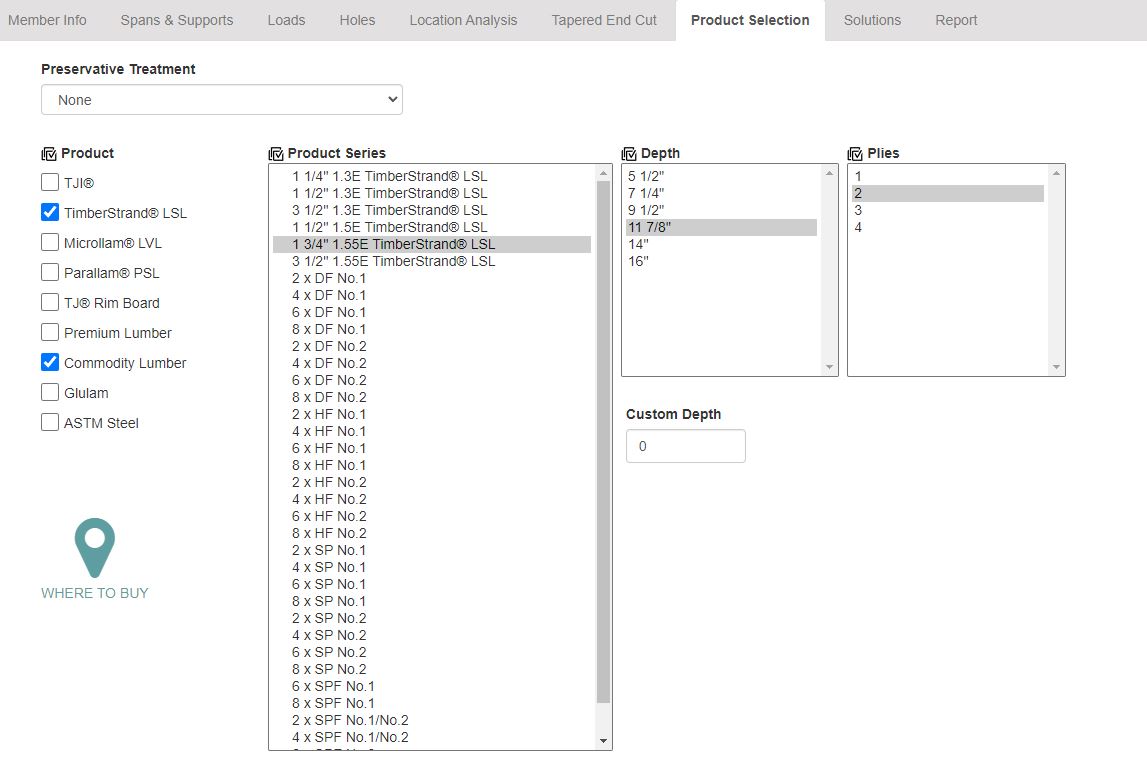
- Sizing the beam: go to Product selection- typically, select 4x SPF No.1/No.2 for the product series, select multiple depths, and 1 ply
- This is a special case however, where the ceiling joists are 11 7/8″ thick, so the product series will be 1 3/4″ Timberstrand 11 7/8″ with 2 plies
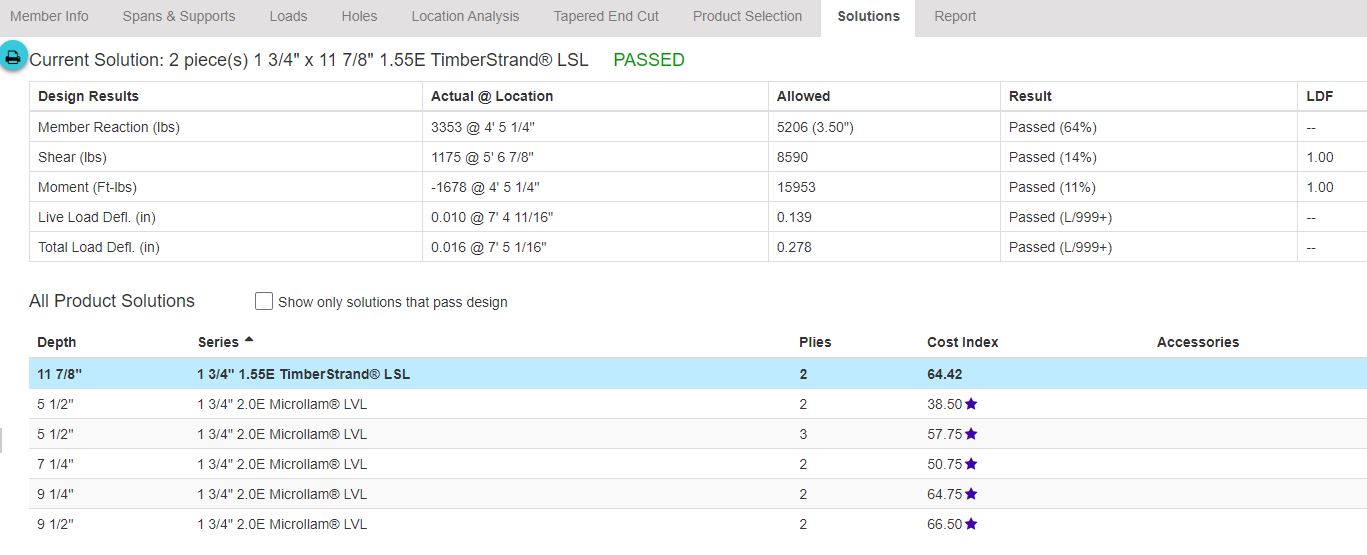
- Now that BM-12 is sized, you can link the load on BM-11
- Now you can size BM-11 (see sizing BM-12 above for process)
- The roof rafters are perpendicular to the floor beam. The roof rafters are also only on part of the beam (11’5 3/4″ from the West 0 point)
Recent Posts
Categories
- Accessibility (2)
- Annotation Templates (1)
- Building Code (6)
- Calculation Templates (2)
- Civil Engineering (3)
- Derivations (8)
- Drafting Standards (18)
- Energy Code (1)
- Geotechnical Engineering (2)
- IT & Software Setup (5)
- Land Use Code (1)
- Product Knowledge (9)
- Production Tutorial (7)
- Research Notes (9)
- Research Tips (1)
- Revit Families (2)
- Revit Tips (5)
- Standard Operating Procedures (6)
- Stormwater (4)
- Structural Calculators (4)
- Structural Engineering (30)
- Structural General (11)
- Uncategorized (29)
