Window and Door Schedules
Last updated July 16, 2024
By Emma Howland
- View>Schedules>Schedule/Quantities
- Select Windows from the Category List (Doors and Windows will be separate schedules)
- Schedule Properties: add fields by selecting and clicking the green arrow. Make sure to follow the order shown below
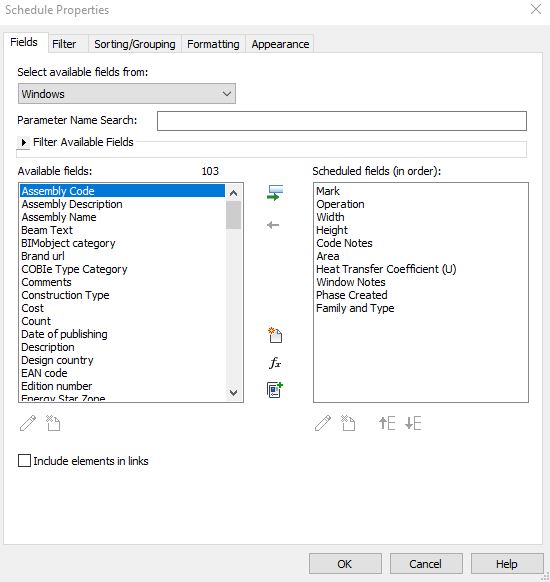
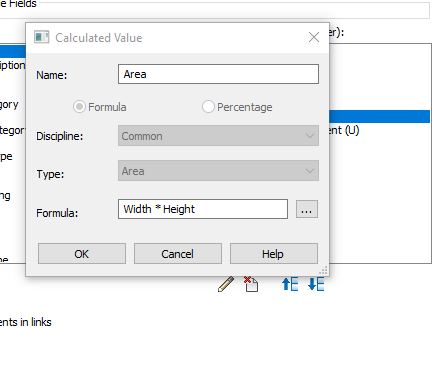
- Hint: If one of the following fields is not shown in the “available fields”, you can create them using the “new parameter” icon or the “calculated value” icon
- Example: Area is a calculated value-
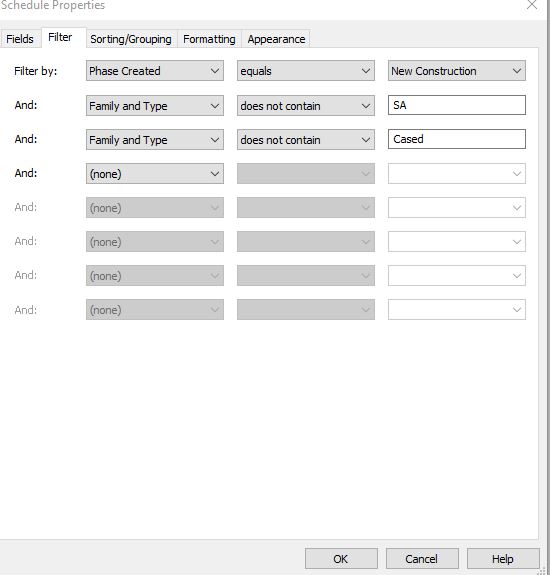
4. Tab over to the Filter settings- Filter for New Construction, and Filter out “SA” and “Cased” frames.
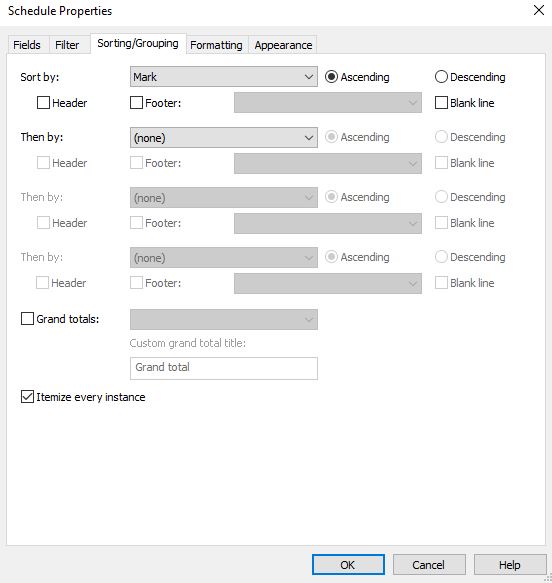
5. Sort by Mark
6. In the Formatting Settings you can change the actual titles for each field:
Ex ‘Mark’ field should be re-titled ‘ID’
- Operation = Type
- Width = W
- Height = Ht
- Code Notes = “”
- Area = Area (SF)
- Heat Transfer Coefficient (U) = U-Value
- Window Notes = Notes/ Remarks
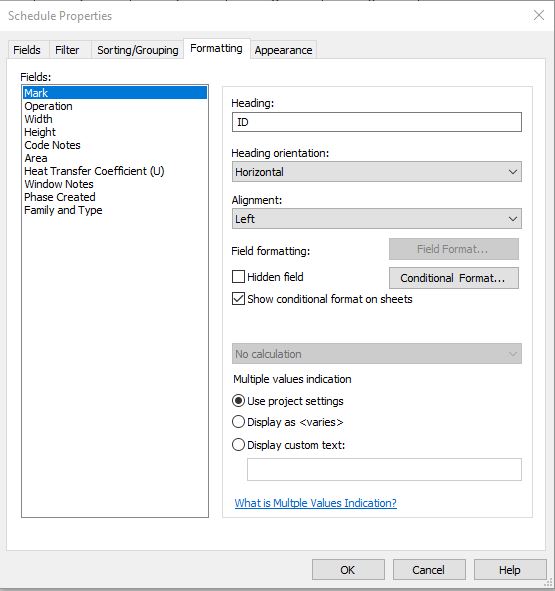
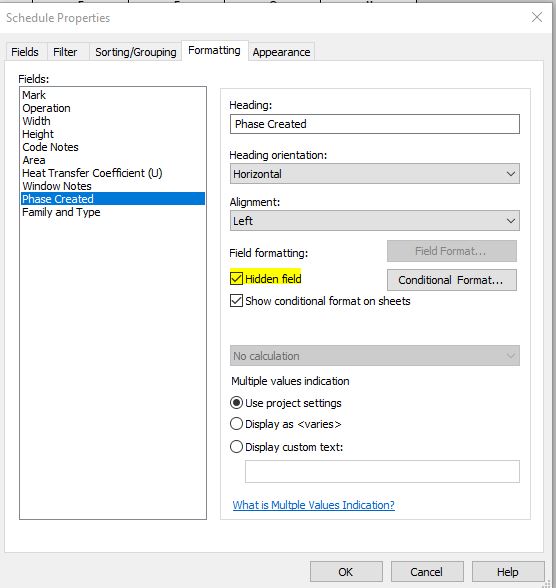
7. In the Formatting tab you can also check the box “Hidden Field” to hide “Phase Created” and “Family and Type”
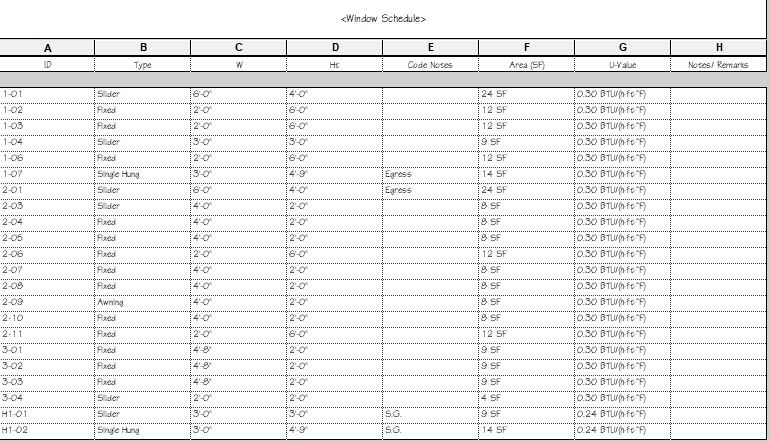
8. This is what the schedule will look like
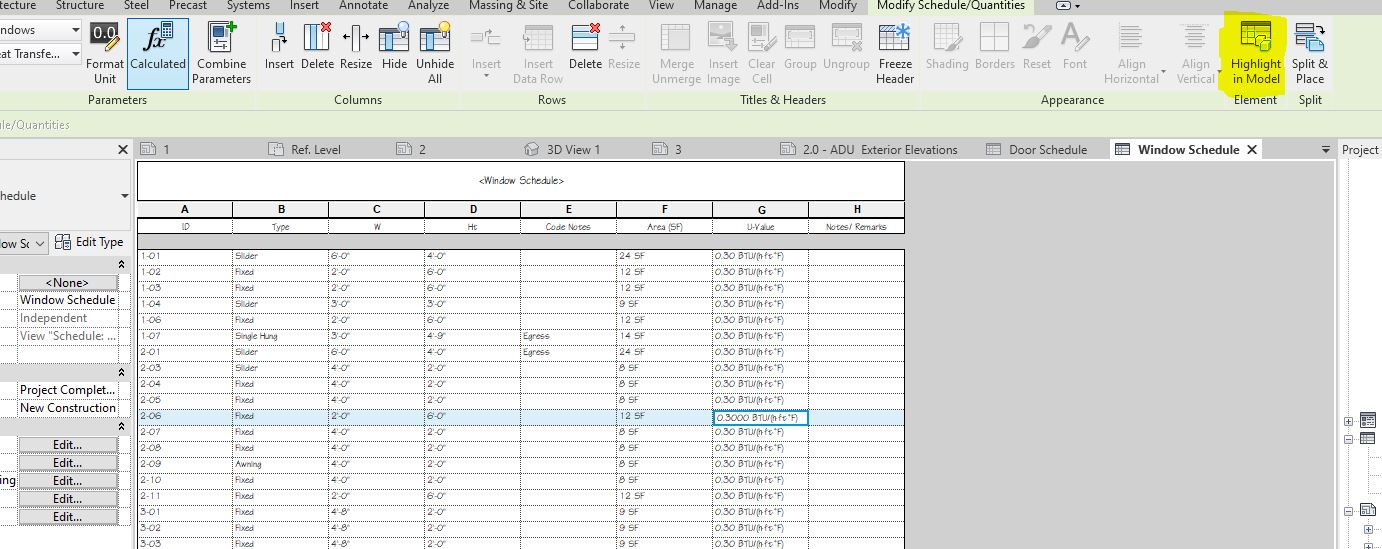
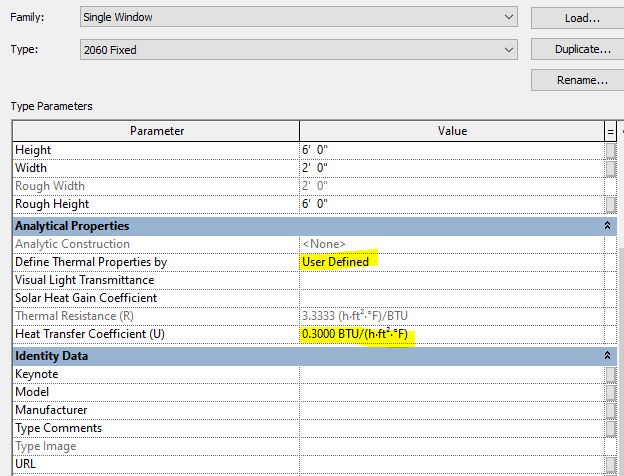
- Hint: There may be empty cells- such as the U-Value. This is because of the property settings in the window family. The easiest way to change these settings is to select the empty cell in the table and then click on the highlight in model on the top banner. Once you know where the window is in the plan or 3D view, edit the type.
Change the Define Thermal Properties to “User Defined” and then manually add the U-value required in the cell.
Recent Posts
Categories
- Accessibility (2)
- Annotation Templates (1)
- Building Code (6)
- Calculation Templates (2)
- Civil Engineering (3)
- Derivations (8)
- Drafting Standards (18)
- Energy Code (1)
- Geotechnical Engineering (2)
- IT & Software Setup (5)
- Land Use Code (1)
- Product Knowledge (9)
- Production Tutorial (7)
- Research Notes (9)
- Research Tips (1)
- Revit Families (2)
- Revit Tips (5)
- Standard Operating Procedures (6)
- Stormwater (4)
- Structural Calculators (4)
- Structural Engineering (30)
- Structural General (11)
- Uncategorized (29)